 |
| Panhead primarys run in pressed inner and outer covers which are decidedly non-oil tight |
Sitting unloved does nothing for the health of the primary chain and, sure enough, rotating it and checking for free play through the inspection hatch, there were a couple of tight spots tighter than a very tight thing – hmm…
With the cover off it was obvious what was amiss: the chain had a murky reddish brown hue to rival the hull of an abandoned trawler. Given the hit-and-miss oiling arrangements it's not surprising Panhead primary chains are notorious for rusting and this one, despite being quite oily, was also rusty. I oiled it and rotated it this way and that for a while but it was clear that nothing useful could be done with the chain in place so it was time for a 'tear down'.
Removing the chain is a relatively simple task presupposing you can shift the nut holding the motor sprocket in place. They come in two sizes and on my bike it's 1-5/16". There now began a tedious saga of sourcing a suitable socket (which I thought I had but didn't) the bottom line of which is: don't trust the given size of an impact socket (the hex type with corner relief, not bi-hex) but measure it first with a vernier before handing over your hard-earned. I'll spare you the boring details but may document it another time.
After a tip-off from a posting on the HDRCGB forum I turned up a 33mm impact socket at, of all places, my local Halfords. Own-brand and under a tenner. It fitted fine and, with a bit of muscle from an impact wrench I borrowed from Geoffrey Chaucer, the nut was off in a blink. One tip: use a jam bar (ie a length of flat steel bar) between the motor and clutch sprockets (which has a left-hand thread) to stop the crankshaft turning when you apply force. I use an old Dunlop tyre lever which is a perfect size and shape.
With the nut off it's possible to lift away the sprocket and chain from the crankshaft and work it out from the under the lip of the inner primary and over the clutch basket. Mine was stretched and came off without even loosening the tranny.
 |
| Chain and motor sprocket removed |
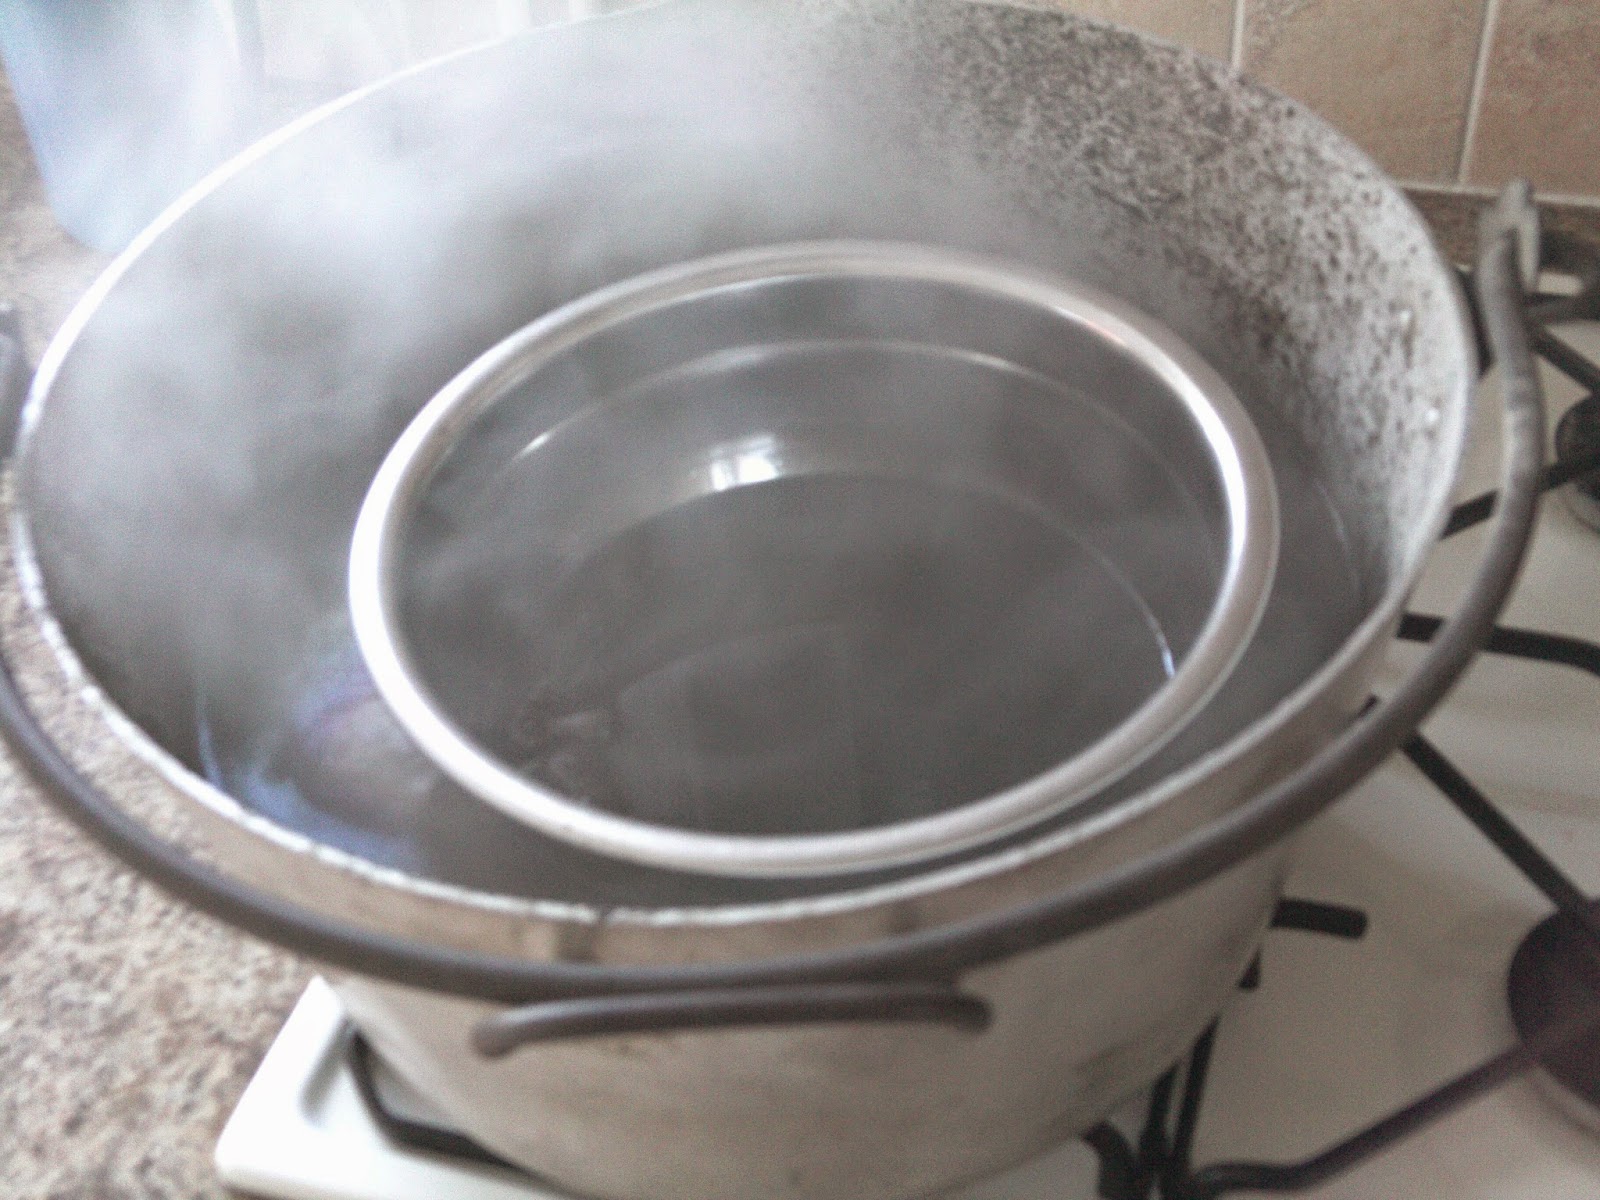
Examining the chain, it was obvious that two links about three inches apart had siezed. My usual strategy in this case is to get the offending link 'spitting' hot (ie not hot enough to change the metallurgy) with a blowlamp and drench it in oil, repeating the process until the link frees, but neither link would give in. Next I waited until my wife was out and then boiled the chain on the kitchen hob in a pan of thick chainsaw oil for 15 minutes but still to no avail. Bollocks! Time to shell out for a new chain.
 |
| Only to be attempted with the wife out or otherwise occupied… |
Diamond is good but expensive, Tsubaki cheaper and not bad. Hello Tsubaki. About 60 quid plus postage for a 428-2 chain. Offering this up it was clear a battle was looming. I freed off the tranny bolts and adjustor but even with the gearbox moved fully forward I had to use a lever to work the sprocket with the chain back on the shaft. The trick when using a lever, of course, is not to bugger up the threads…
 |
| Tsubaki 428-2 – around 60 quid |
 |
| New chain in place |
 |
| Use a jam bar when tightening the sprocket nut |
Anyway, 10 minutes of cursing, levering and cursing some more, and the thing was back in place. Now comes the adjusting. As mentioned above, early pan primarys are adjusted by shunting the tranny to and fro which also affects drive chain and clutch adjustment. Later models have a shoe.
 |
| Non-standard tranny adjustor can just be seen sticking out from the rear of the mounting plate |
 |
| Reset the mousetrap, adjust the rear chain and the job's a good ’un! |
No comments:
Post a Comment